Witnessing someone collapse and struggle to breathe is terrifying, especially if you don’t know how to help. That is where CPR (Cardiopulmonary Resuscitation) comes in which helps keep the flow of blood going when the heart or breathing stops.
Even if you have never learned CPR, doing something is always better than doing nothing. This post will walk you through the basic steps of CPR to help someone until professional help arrives.
What is CPR?
CPR is a first-aid technique used when a person’s heart stops beating or when the person stops breathing. This will keep the heart pumping, circulating blood with oxygen to the brain and other organs, until help arrives.
The aims of carrying out CPR are to keep the blood circulating with oxygen-rich blood flowing to the body and to provide rescue breaths to supply the respiratory organs (lungs) with oxygen.
CPR is made up of two key actions:
- Chest compressions – this keeps the blood pumping.
- Rescue breaths: These are to supply oxygen to the lungs.
There are many ways to do CPR, either on an adult, a child, or an infant. We shall engage more on that of an adult in this post.
How Do You Know If Someone Needs CPR?
CPR should be performed when a person is:
- Unresponsive (not having moved or talked).
- Not breathing, or only gasping for a breath.
- Suddenly collapsed from a heart attack.
- Drowned and unresponsive.
- Choked and are not breathing.
- Involved in a car accident and has stopped breathing.
RELATED SERVICES
What are the Three Basic Steps of CPR?
You can remember the basic steps of CPR by thinking of CAB:
- C stands for chest compressions.
- A for Airway.
- B for breathing.
We will break down each of these steps in detail in the next subhead.
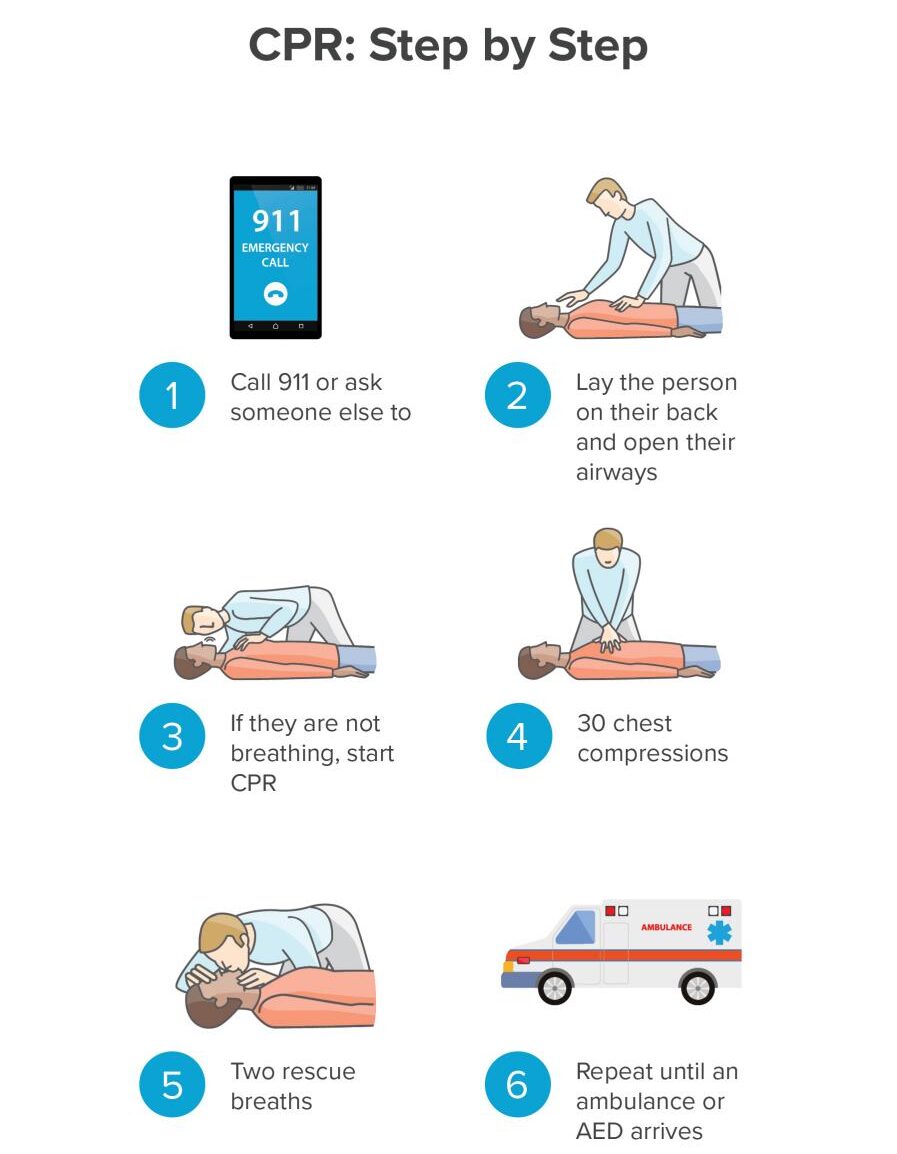
How to Perform CPR Basics
Follow this detailed step to learn how to carry out CPR:
1. Check for Safety and Responsiveness
First, make sure the scene is safe before you start CPR. You do not want to become another victim trying to help someone. Examples include fire, traffic, and falling objects.
Once you have figured out it is safe, you are going to have to check to see if help is needed. You can do this by tapping the victim on their shoulder while asking, “Are you OK?” If you do not get a response, now call 911 or ask someone else to call it.
If the person is in a public place, where an Automated External Defibrillator AED is available nearby, ask someone to get it.
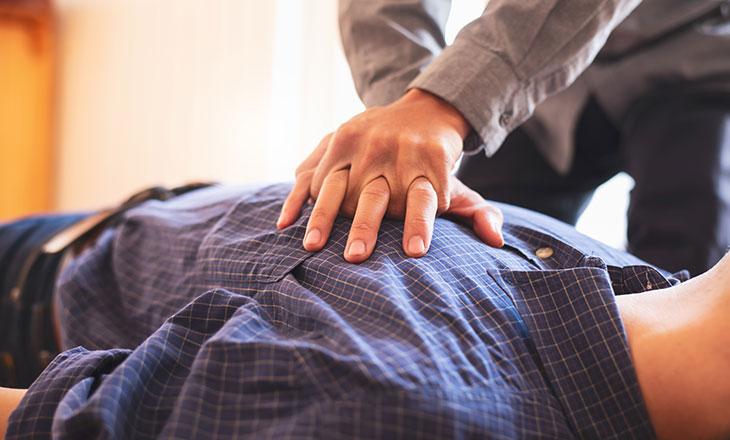
2. Chest Compressions (C for CAB)
If he/she is not responding and not breathing, start with chest compressions. Among all the parts of CPR to be performed, this is the most crucial part.
Place the heel of one hand on the center of the victim’s chest, right between the nipples. Now place your other hand on top of the first, interlocking your fingers.
Lean over the person so that your shoulders are directly above your hands. Keep your elbows straight and use your upper body to push down.
Push down into the chest to a depth of at least 2 inches.
Allow 100 to 120 compressions per minute. One way to keep the pace is to hum the beat of the song “Stayin’ Alive” by the Bee Gees.
Be sure to allow the chest to return to its normal position between compressions; this permits the heart to refill with blood.
3. Open the Airway (A for CAB)
After 30 chest compressions, you will need to provide rescue breaths. First, you need to be sure the airway is clear. You will gently tilt the person’s head back by lifting their chin. This will help open the airway.
Look into their mouth to see whether an object, such as food or perhaps even vomit, is obstructing the airway. If you can visibly see the object, try reaching in with your finger–to remove it. Be careful not to push it back into their airway.
4. Rescue Breaths (B for CAB)
After the airway is open, give two rescue breaths. One second for each breath should make the chest rise. If the chest does not rise, the airway is likely still blocked. Move the head again and try once more.
Pinch their nose shut to block the air from escaping. Seal your mouth over theirs very well. Gently blow into their mouth. With each breath, the chest should rise.
If, on the second attempt, this does not occur with one breath, that means that there is an obstruction of the airway.
5. Continue the Cycle
After two rescue breaths, return to giving 30 chest compressions. Continue the cycle of 30 compressions followed by two breaths until:
- The person starts breathing.
- There is an AED available for use.
- Medical professionals take over.
- You are too exhausted to continue.
What is an AED and How to Use It?
It is a device that delivers an electric shock to the heart to try to get it into a normal rhythm. It’s often available in public places, such as shopping centers, airports, and gyms.
If an AED becomes available while you are doing CPR, stop and follow the machine’s instructions. It will take you through, step by step how to use it which includes, attaching pads to a person’s chest and then stepping back while the machine delivers a shock.
READ ALSO
What is Hands-Only CPR and When Can it be Used?
Hands-Only CPR is a way of doing CPR without giving mouth-to-mouth breaths. It is recommended for anyone who sees a sudden collapse of a teen or adult outside the hospital-for example, at home, at work, or in the park. There are only two simple steps of Hands-Only CPR :
- Call 911 or ask someone to call it for you.
- Start chest compressions immediately.
If you are not trained or uncomfortable giving mouth-to-mouth breaths, you still can help by doing Hands-on CPR. It consists of only doing chest compressions without breaths, which are very effective in maintaining circulation during the first few minutes of CPR.
In the case of Hands-Only CPR, press hard and fast onto the center of the chest. Aim for a rate of 100 to 120 compressions per minute and a depth of at least 2 inches.
Continue to do this until help arrives. Studies prove that chest compressions alone can save a life if the rescuer isn’t trained in delivering rescue breaths.
How is CPR Different for Children and Infants?
So CPR given to children, i.e. children between the ages of 1 to 8 years and infants, or those below 1 year, are almost like adult CPR. However, here are the important differences:
- One hand is used for children instead of two, with compressions about 2 inches deep to the chest.
- For infants, use two-finger compressions and compress the chest to a depth of approximately 1.5 inches. When delivering rescue breaths for an infant, seal your mouth over both their nose and mouth.
How do you do CPR for children and Infants?
- Make sure the area around you is safe from any dangers.
- Check for responsiveness by gently tapping one of the child’s shoulders and asking, “Are you okay?
- If the child responds, maintain them in position and monitor their condition. If the child does not respond, call out for help and lay the child on their back.
- Open the airway by tilting the head and lifting the chin, making careful adjustments for any possible neck injury.
- Check for normal breathing by looking, listening, and feeling, for up to 10 seconds.
- If the child is breathing normally, turn them onto their side for safety and go get help. If they are not breathing, you need to remove whatever object is obstructing their airway and administer 5 rescue breaths.
- For infants, seal the infant’s mouth and nose with your mouth and blow in gently; for children above 1 year of age: seal the mouth, pinch the nose shut, and blow in steadily.
- Start chest compressions with two fingers, pushing down about 4 cm for infants. If the victim is over 1 year old, you can push down on the chest about 5 cm with one or two hands.
- Perform 30 chest compressions followed by two rescue breaths in a continuing cycle.
- If the child is not breathing, continue the CPR until help arrives or the child starts breathing on their own.
Conclusion
Yes, you absolutely can! Learning and practicing basic CPR techniques is not only empowering but can make a life-saving difference. Whether it’s a family member, friend, or stranger, knowing how to act quickly in an emergency can give someone the best chance at survival.
If you are interested, you can enroll in ERA’s First Aid and CPR class to assist you in becoming more confident in these areas.